-->
Showing posts with label Vegetables. Show all posts

Thursday, January 25, 2018

Shahi Parwal

Shahi Parwal step by step instructions:

Parwal, also known as pointed gourd is a vegetable which is not liked by many. But this recipe proves that parwal has a right to be tasty (just being a bit funny).
I made gravy from cashew nuts and poppy seeds. I fried the parwal slices before adding them to the gravy. And trust me, I could not stop myself from eating those fried parwal slices. They were too yum. This recipe is a must try to surprise all the non-lovers of parwal.

Do try this recipe and share your feedback!

Let us start cooking!!!


Ingredients:
Parwal: 5-6 (200 gms)
Oil for frying
Onion: 1 (85 gms)
Tomato: 2 (150 gms)
Cashew nuts: 8-10
Poppy seeds: ½ tbsp.
Water: 1 cup
Oil: 1 tbsp.
Cumin seeds: ½ tsp
Cinnamon stick: 1-inch piece
Bay leaf: 1
Coriander powder: ¼ tsp
Red chili powder: ½ tsp
Turmeric powder: 1 tsp
Garam masala powder: ½ tsp
Kasuri methi (dried fenugreek leaves): ½ tsp
Sugar: a pinch (optional)
Salt as per taste

Method:
1. Peel the parwal, remove the top and bottom part and cut them into halves. If there are many seeds in the parwal then remove those.


2. Thinly slice the parwal.


3. Heat oil in a kadai and fry the parwal slices. Keep the fried slices on an absorbent paper.


4. Heat water in a vessel and add onion, tomato, cashew nuts, and poppy seeds. Let it boil until the onions and tomatoes become tender i.e. for about 8-10 minutes.


5. Let it cool and then grind into a smooth paste. Sieve it.


6. Heat oil in a pan. Add cumin seeds, cinnamon stick, and bay leaf. Fry for a few seconds or until fragrant.


7. Add coriander powder, red chili powder, turmeric powder, garam masala powder, and salt. Mix well.


8. Add the strained paste.


9. Mix well. Let simmer for about 8-10 minutes while stirring occasionally.


10. Add the fried parwal slices and cook for other 3-4 minutes.


11. Add kasuri methi and sugar. Mix well.


12. Serve hot with roti, paratha etc.


13. Delicious “Shahi Parwal” is ready!


Tips:
1. Parwal can be boiled instead of frying to make it healthier.
2. The quantity of water can be adjusted depending upon how one wants the gravy to be.

See you soon with a new recipe till then Happy Cooking!!!

Read More »

Monday, January 22, 2018

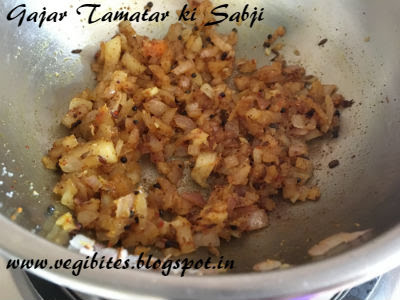
Gajar Tamatar ki Sabji

Gajar Tamatar ki Sabji step by step instructions:

This veggie is very delicious and simple to make. I have used orange carrot here but red carrots can also be used. I added a tbsp. of fresh cream at the end to this veggie which gave it a very rich creamy texture with a wonderful taste.

Do try this recipe and share your feedback!

Let us start cooking!!!


Ingredients:
Tomatoes: 2 (180 gms, finely chopped)
Carrot: 1 (70 gms, peeled and finely chopped)
Onion: 1 (65 gms, finely chopped)
Water: ½ cup
Ghee: 1 tbsp.
Asafetida: 1 pinch
Mustard seeds: ¼ tsp
Cumin seeds: ½ tsp
Red chili powder: ¼ tsp
Coriander powder: 1 tsp
Turmeric powder: 1/8 tsp
Kasuri methi (dried fenugreek leaves): ½ tsp
Fresh cream: 1-2 tbsp.
Salt as per taste

Method:
1. In a vessel heat ghee. Add asafetida and mustard seeds. Let the seeds crackle.
2. Add cumin seeds and fry until fragrant.
3. Add the onions and fry until translucent.


4. Add red chili powder, turmeric powder, coriander powder, and salt. Mix well.


5. Add the tomatoes and cook until tender.


6. Add the carrots and mix well.


7. Add water and let the sabji cook covered for about 13-15 minutes or until the carrots are tender and all the water has evaporated.


8. Add fresh cream and kasuri methi. Mix well.


9. Serve hot with roti, paratha etc.
10. Delicious “Gajar Tamatar ki Sabji” is ready!


Tips:
1. The carrot can be boiled first and then added to the veggie. In this case, one doesn’t need to add water and the cooking time will also be reduced.
2. Fresh cream can be skipped if one is on diet.

See you soon with a new recipe till then Happy Cooking!!!

Read More »

Thursday, January 04, 2018

Bharwan Mirch

Bharwan Mirch step by step instructions:

Stuffed green chilies are very delicious. I have used bhavnagri mirch here. They are a bit fat hence stuffing becomes easier. For the stuffing, I have used gram flour. This recipe is very simple to make and they taste wonderful with roti or paratha. They can be had without any accompaniment also.

Do try this recipe and share your feedback!

Let us start cooking!!!


Ingredients:
Moti mirch (bhavnagri mirch): 7-8 (125 gms)
Gram flour: ½ cup
Groundnut Oil: 2 tbsp.
Mustard oil: 2 tbsp.
Cumin seeds: ½ tsp
Coriander powder: 2 tsp
Fennel seeds powder: 1 tsp
Turmeric powder: ¼ tsp
Chaat masala: ½ tsp
Garam masala: ¼ tsp
Lemon Juice: 1 tbsp.
Salt as per taste

Method:
1. Remove the stem from the chili and slit it vertically. Take out all the seeds.


2. In a kadai heat mustard oil. Add cumin seeds and fennel seeds powder. Roast for a few seconds. Add the gram flour. Mix well.


3. Add turmeric powder, coriander powder, chaat masala, garam masala, and salt. Mix well.


4. Roast the mixture until fragrant.


5. Take out the mixture on a plate and let cool. Add lemon juice and mix well.
6. Now take the green chilies and fill them with the mixture.


7. In a vessel heat groundnut oil and keep all the stuffed green chilies in it.


8. Cover the vessel with a plate and keep the vessel on a hot iron griddle.


9. Keep the flame on low always.
10. Occasionally stir the chilies. Since we are using the double layer cooking method the chances of getting the chilies burnt are less.
11. Cook for about 15-18 minutes or until the chilies are soft and tender.


12. Serve hot or cold with roti, paratha etc. They can be refrigerated for 5-6 days.
13. Delicious “Bharwan Mirch” is ready!


Tips:
1. I have not used red chili powder, but if you want it can be added to a certain extent.
2. Roast the gram flour well with the other masalas.
3. Always keep the vessel in which we are cooking the chilies on another heavy bottomed vessel. This technique ensures that the food inside the vessel will not burn and won’t require water for cooking.
4. Lemon juice can be replaced with citric acid also.

See you soon with a new recipe till then Happy Cooking!!!

Read More »